Before talking about annotations we should talk a little bit about why TestNG is required and what is the need for using any test management frameworks in our test.
All the tests are designed to allow you to quickly verify your application using a very large and diverse set of different data inputs. So test management tools are responsible for managing our test and provide many functionalities or you can say methods we can directly use in Test and no need to write the logic again like comparing two objects, pre-setup for Test, passing a different set of data and many more.
TestNG use annotations for configuration in the test like creating data, pass data, setUp, cleanup and many more. Annotation is a Java feature and you can read more about annotation. So let’s see what annotations are there in TestNG.
Annotations, a form of metadata, provide data about a program that is not part of the program itself. Annotations have no direct effect on the operation of the code they annotate.
TestNG Annotations and Execution order:
@BeforeTest and @AfterTest
@BeforeTest - Run before any test method in the class inside the tag is run.
@AfterTest - Run after all the test methods in the class inside thetag have run.
@AfterTest - Run after all the test methods in the class inside the
package com.tutorial.testng;

import org.testng.annotations.*;

public class TestngAnnotations {

    @BeforeTest
    public void beforeTest() {
        System.out.println("In @BeforeTest");
    }

    @Test()
    public void testMethod1() {
        System.out.println("In @Test - testMethod1");
    }

    @AfterTest
    public void afterTest() {
        System.out.println("In @AfterTest");
    }
}
In @BeforeTest
In @Test - testMethod1
In @AfterTest
@BeforeMethod and @AfterMethod
@BeforeMethod - Run before each @test method.
@AfterMethod - Run after each @test method.
@AfterMethod - Run after each @test method.
package com.tutorial.testng;

import org.testng.annotations.*;

public class TestngAnnotations {

    @BeforeTest
    public void beforeTest() {
        System.out.println("In @BeforeTest");
    }

    @BeforeMethod
    public void beforeMethod() {
        System.out.println("In @BeforeMethod");
    }

    @Test()
    public void testMethod1() {
        System.out.println("In @Test - testMethod1");
    }

    @AfterMethod
    public void afterMethod() {
        System.out.println("In @AfterMethod");
    }

    @AfterTest
    public void afterTest() {
        System.out.println("In @AfterTest");
    }
}
In @BeforeTest
In @BeforeMethod
In @Test - testMethod1
In @AfterMethod
In @AfterTest
@BeforeClass and @AfterClass
@BeforeClass - Run before the first @test method in the current class.
@AfterClass - Run after all the @test methods in the current class.
@AfterClass - Run after all the @test methods in the current class.
package com.tutorial.testng;

import org.testng.annotations.*;

public class TestngAnnotations {
    @BeforeClass
    public void beforeClass() {
        System.out.println("In @BeforeClass");
    }

    @BeforeTest
    public void beforeTest() {
        System.out.println("In @BeforeTest");
    }

    @BeforeMethod
    public void beforeMethod() {
        System.out.println("In @BeforeMethod");
    }

    @Test()
    public void testMethod1() {
        System.out.println("In @Test - testMethod1");
    }

    @AfterMethod
    public void afterMethod() {
        System.out.println("In @AfterMethod");
    }

    @AfterTest
    public void afterTest() {
        System.out.println("In @AfterTest");
    }

    @AfterClass
    public void afterClass() {
        System.out.println("In @AfterClass");
    }
}
In @BeforeTest
In @BeforeClass
In @BeforeMethod
In @Test - testMethod1
In @AfterMethod
In @AfterClass
In @AfterTest
@BeforeSuite and @AfterSuite
@BeforeSuite - Run before all @tests in the current suite. @AfterSuite - Run after all @tests in the current suite.
package com.tutorial.testng;

import org.testng.annotations.*;

public class TestngAnnotations {
    @BeforeSuite()
    public void beforeSuite() {
        System.out.println("In @BeforeSuite");
    }

    @BeforeClass
    public void beforeClass() {
        System.out.println("In @BeforeClass");
    }

    @BeforeTest
    public void beforeTest() {
        System.out.println("In @BeforeTest");
    }

    @BeforeMethod
    public void beforeMethod() {
        System.out.println("In @BeforeMethod");
    }

    @Test()
    public void testMethod1() {
        System.out.println("In @Test - testMethod1");
    }

    @AfterMethod
    public void afterMethod() {
        System.out.println("In @AfterMethod");
    }

    @AfterTest
    public void afterTest() {
        System.out.println("In @AfterTest");
    }

    @AfterClass
    public void afterClass() {
        System.out.println("In @AfterClass");
    }

    @AfterSuite
    public void afterSuite() {
        System.out.println("In @AfterSuite");
    }
}
In @BeforeSuite
In @BeforeTest
In @BeforeClass
In @BeforeMethod
In @Test - testMethod1
In @AfterMethod
In @AfterClass
In @AfterTest
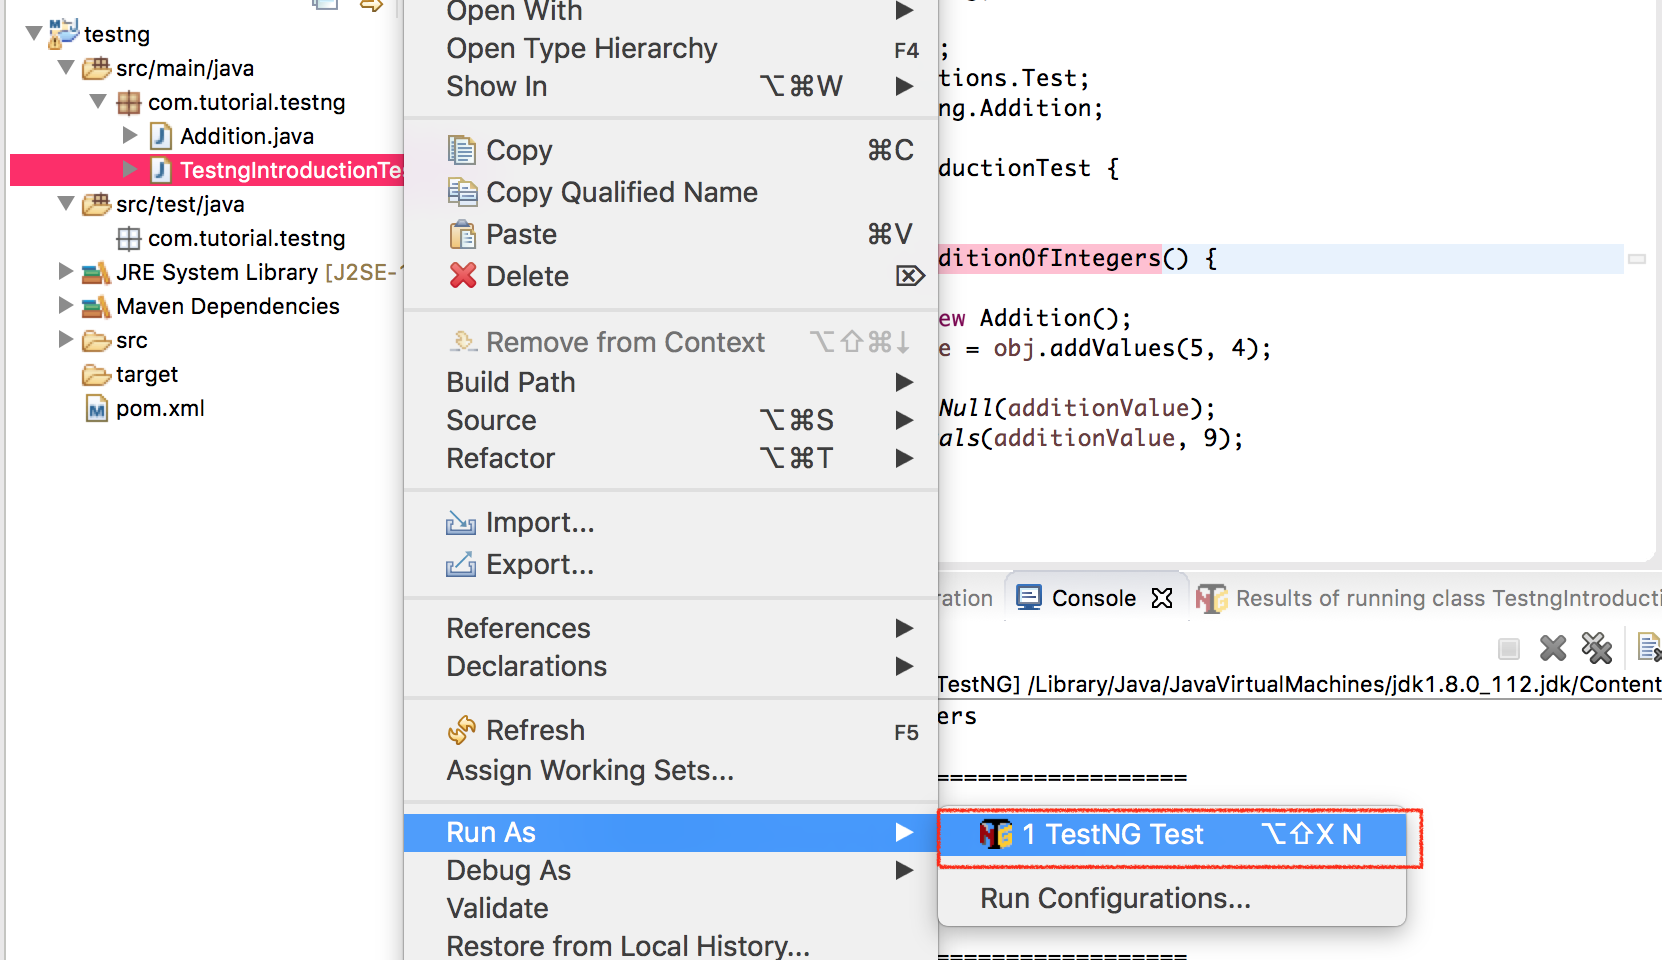
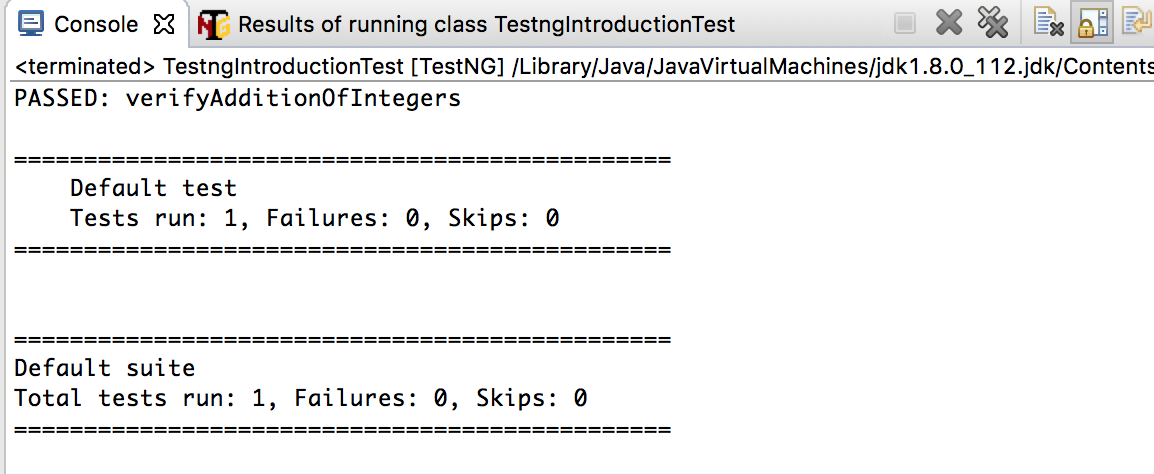
PASSED: testMethod1
===============================================
Default test
Tests run: 1, Failures: 0, Skips: 0
===============================================
In @AfterSuite
===============================================
Default suite
Total tests run: 1, Failures: 0, Skips: 0
===============================================